Bernard Hwang

Level Designer

DevBlog

DevBlog - MechDog - The Role of Ads

DevBlog, Solo ProjectBernard HwangComment

This post covers one of the more controversial aspects of mobile games, the role of in-game ads. During development of MechDog, I had a crash course in in-game ad design. Faced with the decision of how to monetize MechDog, I was in a position where I realized the value of having ads, but at the same time was well aware of the stigma attached to ads.

Everything you see in this post is work in progress.

WHAT KIND OF ADS?

There are two popular formats for ads in mobile games.

Banner Ads
Placed on the game screen, these ads are always visible to the player when they are playing. A popular option for these ads lets players pay a fee to have them removed.

Interstitial Ads
These ads take up the entire screen for a certain amount of time. There are options to make these ads skippable or unskippable. Some games reward the player for choosing to watch these ads.

Shop Slot Spin

MechDog's ads are placed in the shop screen. Pressing the "Watch Ad" button:

  1. Shows the ad (interstitial, unskippable)

  2. Plays a slot roll animation that cycles between the 4 upgrade options

  3. Lands on a random upgrade which is awarded to the player

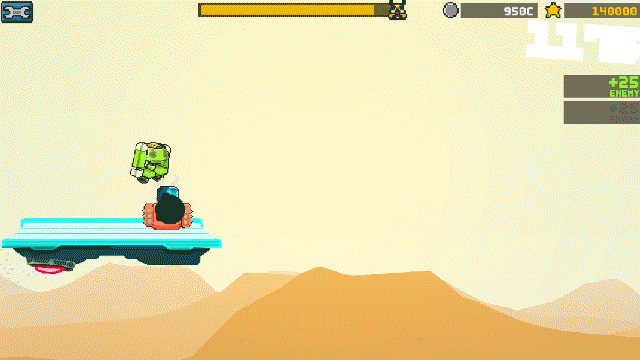
I attached an extrinsic reward to the ads to supply a positive with a negative. In terms of when this ad appears, they show up after a challenging dungeon section providing a lull in the game's intensity.

Design

What caused caution when implementing ads?

As mentioned at the top of the post, there is a danger when implementing ads in a game. Sticking an ad close to hotspots for touch controls can easily cause frustration, and following a game over screen with an ad can instantly turn a player off to a game. A poorly placed ad can be obtrusive, stagnating, and even punishing for the player.

What was the approach for MechDog's Ad Placement?

There were two rules I followed when placing ads in MechDog

  1. Have Purpose for the Placement
    Any ad shown in the game should have a greater purpose than merely being to make money. It's a simple rule, but it is easily broken when ad design is lazily approached.

  2. Don't Punctuate Negative Feedback
    By the nature of what they are, ads are a negative. They interrupt flow/concentration by showing unrelated content. Accompanying a negative action in-game with an ad puts focus on how intrusive the ad is.

Dev Blog - MechDog - The Shop

Solo Project, DevBlogBernard HwangComment

The shop system was iterated so that a few of the game systems were better aligned with the game's main aesthetic. 

Everything you see in this post is work in progress.

Previous Shop Implementation

Recap

The previous shop system created this loop:

In the previous version of MechDog, upgrades were only available on the main menu and not in game. All upgrades purchased were applied permanently to the player's character for all future runs.

Analysis

The upgrade system provided a set of long term goals; it gives players something to strive towards in-between runs. A con of the permanent upgrade system was that it made the leaderboard an unreliable tracker of player skill. Player scores were being augmented by the amount of upgrades in the player's possession. The player's focus was split during a run between, collecting currency for the next upgrade and getting a good score for the current run; two goals that are orthogonally opposed.

Reconstructing the Pattern

This shop pattern is created from the combination of these components:

  • Permanent Currency System
  • Permanent Upgrade System
  • Player abilities
  • Score System

The score system is the "end-game component", the component that is being supported by the rest of the components in this system. In the context of the shop pattern, the currency system supports the upgrade system, and the upgrade system which improves player abilities supports the score system.

Knowing the problem that we want to solve and how the related components work with each other helps us better aim our iterations.

Iterating on the Shop

  1. The initial iteration was to move the upgrade system into the game run. The shop menu would only appear after the player completed a dungeon, and any purchased upgrades would only affect the player during the current run. The currency used in the shop was still persistent between game runs, so the problem of mixed player goals still existed.
  2. The next iteration changed the currency system so that it would only persist in one game run as well. This removed the long-term goals in the game, but doesn't create conflicting goals between score and currency.

Result

The new shop loop is all self-contained in a single game run. On any run, players start out on an even playing field, giving no one a score advantage from the start. The end run score the player receives is achieved purely through player skill rather than a player's playtime. The new shop loop aligns the goals of getting a better score and getting upgrades since they both only take place in the same instance.

Design

Why prioritize score over upgrades?

I wanted the social aspect of MechDog to be more profound. That's why the game includes Google Play leaderboards. The initial playtest group I had for MechDog made the game into a competitive experience, and I didn't want to subtract from that experience with systems that undermined the score aspect of the game.

What does having a shop add to the game?

The shop adds an intermediate goal in the game. Completing a moment-to-moment segment tests the player's platforming skill. Going through multiple moment-to-moment segments tests the player's ability to collect coins for the upcoming shop screen.

Dev Blog - MechDog - Dungeon Meter

DevBlog, Solo ProjectBernard HwangComment

A new system was designed to add interactivity during level generation.

Everything you see in this post is work in progress.

Previous Level Generation

Recap

I go into detail about the previous level generation method in this previous dev blog. But here is the quick recap: 

The previous generator created level sequences based on designer input. The input determined the order in which level segment types would appear. Segments of challenge and reward were interspersed to try and create a good flowing experience.

Analysis

The components that made up the generator were these:

  • Procedural generator (system rules)
  • Level types (content for the system)
  • Sequence code (designer input)

The component that the generator didn't utilize was "player action". The generator created levels independent of how the player was doing. Two players of different skills received similar experiences from the level generator.

The Dungeon Meter

The question was then raised: How can the level generator create different experiences for players of different skill levels?

The player's actions needed to be factor into level generation. The two actions that helped indicate player skill were collecting coins and destroying enemies. The latter was chosen as it was the more challenging action of the two.

Now I needed a way to affect the level generator. Fortunately, the level generator already sorted level segments by difficulty. I created a meter that charted enemy kills and that needed to be filled before producing more challenging level segments (dungeons). 

Result

With the game's minimalist approach to controls, player actions needed to have high feelings of agency. The meter served the purpose of providing intermediate feedback for the player's actions. The feedback was longer term than an immediate points reward, but more frequent than the end-game score screen.

Design

Why make the level generator responsive to the player?

When a person plays a game, a relationship is formed. The player inputs actions -> the game outputs feedback -> the player interprets those actions and inputs more actions. When more game components are able to respond to the player's inputs, the game feels like a better experience. I realized that the procedural level generator was a perfect target for injecting a little more life into.

Was this an easy change to implement?

The level generator was already broken up into exposed components which allowed me to quickly iterate and find solutions. The system was initially designed like this to test specific level segments without having to play to that point. Because these components were already exposed, it was relatively easy so create another system that utilized the exposed components.

Dev Blog - MechDog - Visuals

DevBlog, Solo ProjectBernard HwangComment

Small solo projects like MechDog provide great opportunities to explore new techniques, so I decided to try something different for the game's visual style. This dev blog entry will be less about design and more about art.

Everything you see in this post is work in progress.

Textures

Normal Maps

Applying a normal map on sprites allows the sprites to appear like they have height changes.

Physically Based Rendering

With Unity 5's PBR shader, I applied Unity's 'Standard' material on the sprites to be able to control how the sprites react to light.

using PBR and normal map

Lighting

I tested out different lighting approaches to see which I preferred.

2D Lighting

I initially tried a 2d lighting solution. The 2d light caster only casted light in areas not behind 2d collider marked as shadowcasters. It was fairly simple to implement, but it was difficult to tweak values like light strength and fade off distances.

A big drawback with 2D lighting is that it is not fast enough. For animated sprites to cast accurate shadows, each frame has to have its own 2d collider shaped like the frame. The 2d lights had a hard time matching the speed at which the sprite animations were changing.

3D Lighting

I then tried using Unity's built-in 3d lights for shadows. After assigning 3d shadow casters to each sprite and allowing sprites to receive shadows, the visuals really started to look good. I still had to make a 3d mesh for each frame of a sprite animation so that all frames could cast accurate shadows, but the shadows were cast much faster than the 2d lights.

A big plus with this method is that I am able to get sprite tiles to cast shadows on themselves by placing shadowcasters that extrude to in front of the sprite. In the image below, you can see two different light sources affecting one sprite with a clear divide created by a shadowcaster.

Dev Blog - MechDog - Level Generation

DevBlog, Solo ProjectBernard HwangComment

The levels in MechDog are generated using two different generators. 

Everything you see in this post is work in progress.

Generator 1 - Level Segments

Generator 1 builds the exterior parts of the level. These areas consist of open spaces that introduce new obstacles. The idea here is to create spaces for players to freely engage with new content.

The generator uses a series of designed level segments so it requires a good collection of pre-designed level segments to fuel it.

Example of level segments

The generator follows this process:

  1. Choose an obstacle type, starting with easier types first

  2. Generate a level segment that contains the obstacle type

  3. Generate another level segment that uses the same obstacle type, but this time spawn in on top of a platforming segment

As the difficulty increases, this generator starts creating combos of obstacles to increase intensity.

Generator 2 - Trail Run

Generator 2 builds dungeons that utilize the obstacles just used by 'Generator 1'. The player is put to the test by having to deal with the obstacles in a smaller more dangerous space.

The generator follows a series of steps to create a dungeon.

Path Generation

First, it creates a solution that starts from the bottom left and works its way until it hits its right boundary.

Visualized below, the generator starts at the bottom left and then picks from its limited choices which space to move to. The colored blocks represent which directions the path can continue on from that point.

  • Red = Up, Down

  • Green = Up, Down, Right

  • Blue = Right

ROOM GENERATION

The solution path is then replaced with three different types of rooms.

  • Room with exits on the top and bottom

  • Room with exits on the left and right

  • Room with exits on the left, top and bottom

For each room type, there is a collection of room designs that range in difficulty. The generator picks increasingly difficult rooms to vary the dungeon and create a rising challenge. Even with only four different room designs per type, the dungeons that are generated appear unique from each other.

Generator creating multiple dungeons

Generator in-game

Generator in-game

Design

Why Create a Level Generator?

It was a new challenge. Having never created a procedural level generator for a platformer before, I saw this as an opportunity to expand my skills. A level generator also meant that each play experience could potentially feel unique from the last one.

What was learned from making a level generator?

With my approach to level generation, I learned that appearing procedurally generated is very much about hiding the handcrafted portions. I had specific moments that I wanted the player to hit, so I created those moments first and then made sure that the generator had plenty of options to modify the moment.

What Challenges were there in making the generators?

While the advantage of a procedural generator is that it creates something new every time, its proved a challenge to make sure the generator produced a well-paced sequence. My approach to this was to make the generator follow an interest curve. I gave the generator a general guide for when to spawn difficult sections and when to choose easy sections. The hard part of this challenge is that it is difficult to figure out if the approach worked or not.